Dealing with a pet who has no respect for rugs can be really frustrating, and that’s exactly what happened to us with our cat Lucky. We thought we were safe this time, but no matter what we tried, Lucky kept finding ways to ruin our floor coverings. We had this big entry mat—it was rubbery with a pattern of gaps and swirls, something that should’ve been completely uninviting to a cat looking to use it as a bathroom spot.
But Lucky, our cranky old man, somehow managed to balance himself just right to do his business on it anyway, and each time he did, the laminate flooring underneath got more and more damaged. Finally, I reached my breaking point. I was genuinely worried about the subfloor being compromised, and it was clear something had to be done. Our entryway is the main way we come into the house, so whatever solution we came up with had to be friendly to wet and muddy shoes and tough enough to withstand everyday wear and tear. We’ve got plans to install beautiful hardwood flooring throughout the main level one day, but that’s an expensive project and not one we were ready to tackle yet.
Plus, I wanted something durable for this entry point that could hold up better than the laminate that was already showing signs of serious damage. After thinking about it, my husband and I agreed that most tiled entryways look outdated or just aren’t our style. But then I remembered what we did in our kitchen: we used hexagon porcelain tiles, cutting out parts of the laminate floor and fitting the tiles in like puzzle pieces. It created a neat transition and a unique look that blended two different types of flooring seamlessly. So, I decided to do the same thing in the entryway—cut out the ruined laminate section and replace it with the same hexagon tile from the kitchen. This way, we wouldn’t end up with too many different flooring materials on the main level, keeping the overall look cohesive.
The porcelain tiles I chose are durable, easy to clean, and textured enough to prevent slipping, which is perfect for an area that gets wet and muddy. The tile area wouldn’t need to be huge—just enough to act like an entry “rug” and cover the damaged flooring beneath. Best of all, since I already had most of the supplies leftover from previous projects, this ended up being a pretty affordable fix. If you had to buy everything from scratch, it would cost about $250, but the tile itself was only a little over $100.
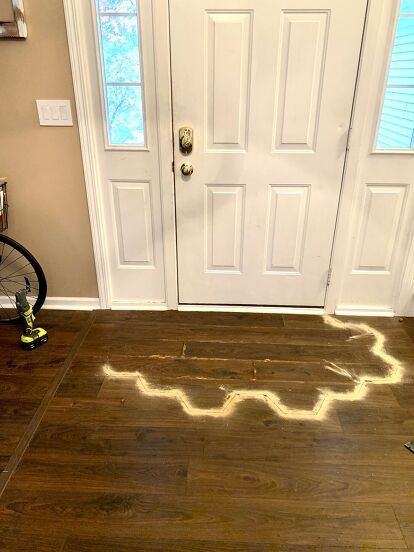
Here’s what I used: hexagon floor tiles from Mission Stone & Tile, waterproof membranes like AquaDefense and Schluter Kerdi, rapid-setting thin-set mortar, grout, and caulk. Once my tile arrived, my four-year-old and I had fun planning the shape of the tiled entry. We tried out some fun shapes, but I ultimately decided to lay the tile directly over the ruined floor after cleaning it as well as I could. I spaced the tiles exactly how I wanted the grout lines to appear and made sure to leave out a tile to cut for the pieces that would go right up against the door. I then traced the tile layout onto the floor with a Sharpie, leaving a little extra room to adjust later and to allow space for caulk between the tiles and the existing flooring. After outlining the area, I moved the tiles aside and began the messy job of cutting out the old laminate along the traced lines using my oscillating saw.
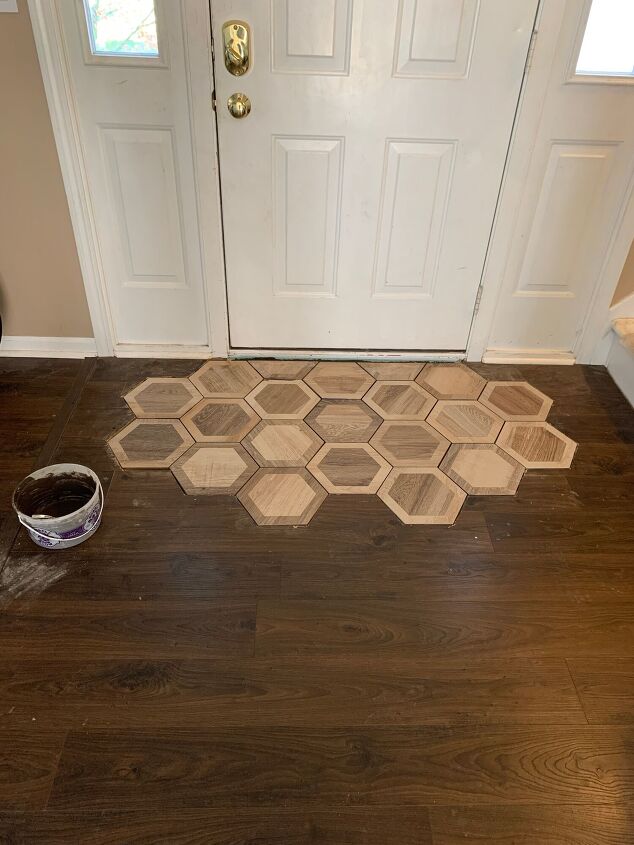
This tool is perfect for getting clean cuts in tight corners, especially with hexagon tiles. If you have a circular saw, it can speed things up for straight cuts, but mine was out of commission at the time. After cutting, I pried up the damaged boards, cleaned up the debris, and tossed everything in the trash. Next, I waterproofed the exposed subfloor. In the kitchen, I’d used the more expensive Schluter Ditra membrane, but here I opted for the thinner Schluter Kerdi membrane combined with a few coats of AquaDefense liquid membrane. This combo was cost-effective and sufficient for the small space. I made sure to waterproof under the door too since the previous quarter-round wasn’t offering enough protection, and moisture had already caused damage there. After letting the waterproofing dry, I mixed rapid-setting thin-set mortar in an old ice cream bucket and spread it evenly over the area. Because it was a small space, I simply poured the mortar in a puddle and worked it around with a paint stir stick until it was level. Then I began placing the tiles one by one, pressing each firmly into the mortar and leaving space for grout lines.
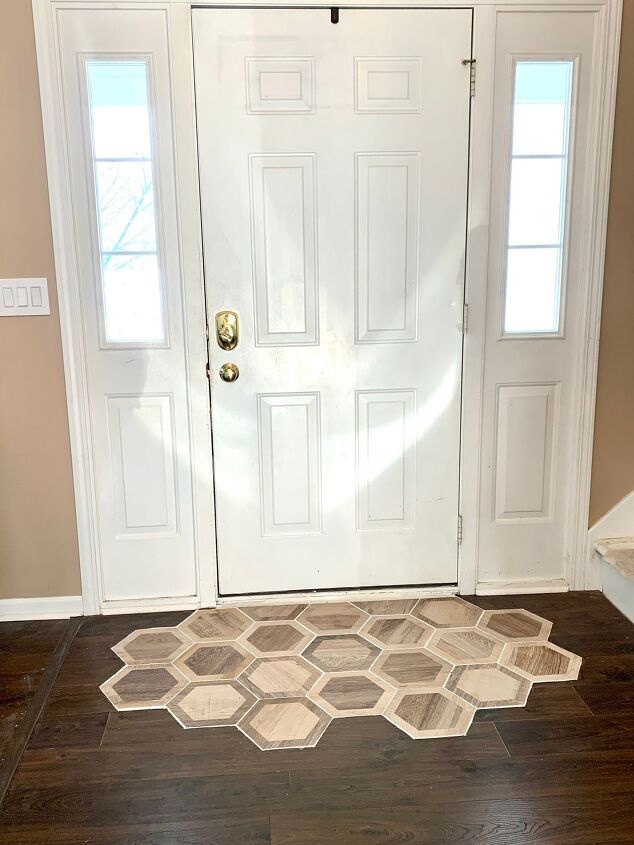
I wiped away any mortar that oozed up between the tiles so the grout would look clean. For the edge tiles, I took one to the garage and cut it in half with a rented tile saw, fitting the pieces perfectly along the doorway and wall. I let the tiles set overnight, making sure no pets or kids stepped on them during this time. The next day, I mixed grout and filled the spaces between the tiles, working carefully to avoid air pockets. For the gaps between the tile edges and the existing flooring, I left those to be caulked later, since caulk flexes better and handles floor movement. Grouting made a bit of a mess, but after it dried, I wiped off the excess with a damp sponge. A handy tip: baby wipes are amazing for removing grout haze from tiles once it’s mostly dried. Finally, I caulked the edges where the tile met the old floor and along the door threshold with white caulk that matched the grout. Using a baby wipe to smooth the caulk helped hide any uneven cuts or gaps. Now, instead of dealing with a ruined floor under a mat, we have a stylish, durable tiled entryway that can handle muddy boots and wet shoes with ease. Best of all, I no longer worry about Lucky damaging the floor, and we have a clean, welcoming space every time we walk in.