Bathroom upkeep can sometimes feel overwhelming, especially when it comes to issues like cracked caulking. While it might seem like a small cosmetic problem, cracked caulk can quickly lead to bigger issues, including water damage and mold growth, if not handled promptly. My dad, who has always been a hands-on DIY enthusiast, taught me a simple but incredibly effective method to fix cracked caulking in the bathroom—without needing to rip out and replace all of it.
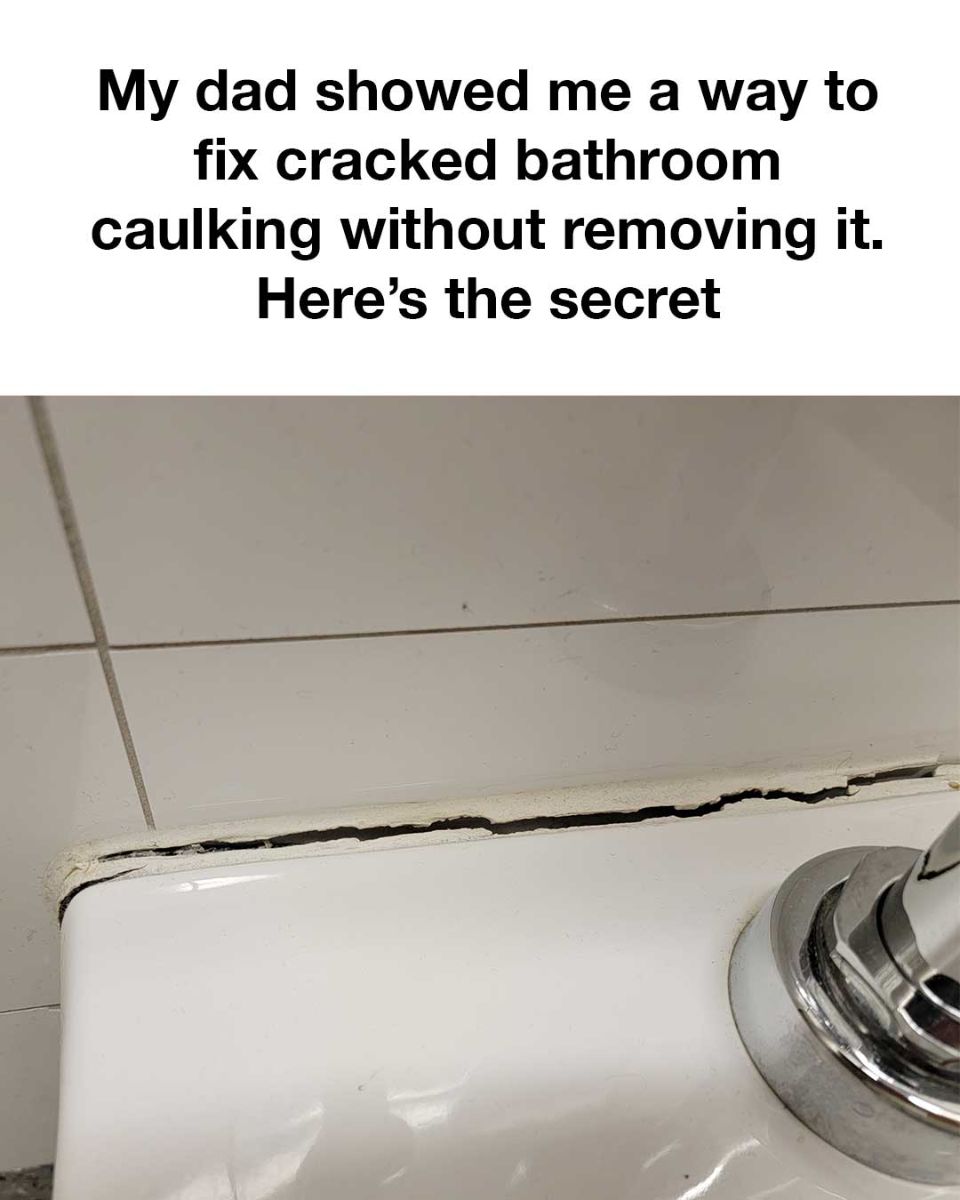
His approach is easy, budget-friendly, and saves a lot of time, making it perfect for anyone who wants to maintain a clean, functional bathroom without taking on a major renovation project. The reason caulking cracks in the first place is pretty straightforward: bathrooms are constantly exposed to moisture, steam, and fluctuating temperatures, which can cause caulk to dry out, become brittle, and eventually pull away from surfaces. When this happens, it creates gaps where water can seep through, and that’s when mold, mildew, and even structural damage can begin.
Fixing it quickly is essential, and luckily, the process doesn’t require tearing out all the old material if the damage is minor or surface-level. To get started, gather a few basic materials that you can find at most hardware stores: a tube of silicone caulk (choose a color that matches your current caulking), a caulk smoothing tool or a plastic spoon, a utility knife, rubbing alcohol, a clean cloth, and some painter’s tape. These supplies are all affordable and can be used for various other home projects, too. Start the repair by cleaning the affected area thoroughly with rubbing alcohol and a cloth. This step is crucial for removing dirt, soap scum, and oils that could prevent the new caulk from adhering properly. Once the area is dry, apply painter’s tape on either side of the crack to ensure clean edges and prevent the caulk from spreading beyond where it’s needed.
Next, apply a thin, even bead of silicone caulk directly over the cracked area, making sure it completely fills in the gaps. Use your smoothing tool or the back of a plastic spoon to press the caulk down and smooth it out so it blends in with the surrounding surface. Once the caulk is applied and smoothed, carefully peel away the painter’s tape and let the caulk cure undisturbed for at least 24 hours before exposing it to water. What makes this method work so well is its practicality. You’re reinforcing the existing caulk with a new waterproof seal, rather than spending hours scraping out every last bit of the old material.
Silicone caulk is especially ideal for this because it remains flexible over time and stands up to the constant moisture found in bathrooms. This trick essentially creates a strong, new barrier that protects against leaks while also improving the look of your caulking lines. While this fix is great for small or moderate cracks, it’s important to know when a full replacement is necessary. If the caulk is peeling, moldy, or missing in large sections, it’s best to remove it entirely before applying new caulk. Also, be sure to use a high-quality silicone caulk that’s designed for bathroom use, as it will resist mildew and provide a longer-lasting repair. Make sure your bathroom is well-ventilated during application and curing, as proper airflow helps the caulk set more effectively. In summary, repairing cracked bathroom caulking doesn’t have to be a time-consuming or expensive job. Thanks to my dad’s straightforward method, anyone can tackle this task in just a few steps, without the stress of a full removal. Not only does it improve the appearance of your bathroom, but it also helps prevent water damage and mold from creeping in. Keeping up with small maintenance tasks like this ensures your bathroom stays clean, safe, and looking its best for years to come—no professional help required.